A proximity sensor is a solid-state switch — no moving parts — that detects when an object gets close enough, without touching it. A photoelectric sensor does the same thing using a beam of light. Both technologies show up everywhere from the endstop switch on your Ender 3 to the part-present detector on a $2 million stamping line, because the fundamental problem they solve — “is something here, yes or no?” — never goes away. If you’ve ever watched a 3D printer crash its nozzle into the bed during homing because the stock mechanical endstop drifted, or if you’re building a CNC workholding fixture that needs to confirm a part is seated before the spindle starts, this guide is for you. We’ll walk through sensor physics, the NPN/PNP output debate, voltage-level interfacing, and the real-world gotchas reviewers document in technical detail that most selection guides skip entirely.
| EDITOR'S PICKTaiss/1 Pair photoelectric Swit… | Mid-tierHeschen M18 Capacitive Proximit… | Budget pickHeschen M18 Inductive Proximity… | |
|---|---|---|---|
| Detection | 0-20M | 10mm | 8mm |
| Voltage | 6-36V | 10-30VDC | 10-30VDC |
| Output type | NPN NO | NPN NC | NPN NO |
| Operation mode | Through-beam | Capacitive | Inductive |
| Wires | — | 3 | 3 |
| Housing size | — | M18 | M18 |
| Price | $27.99 | $9.29 | $7.49 |
| See on Amazon → | See on Amazon → | See on Amazon → |
Inductive vs. Capacitive vs. Photoelectric: Pick Your Physics First
Before you look at a single part number, you need to match the sensing technology to what you’re actually detecting. Getting this wrong is the most common source of expensive returns.
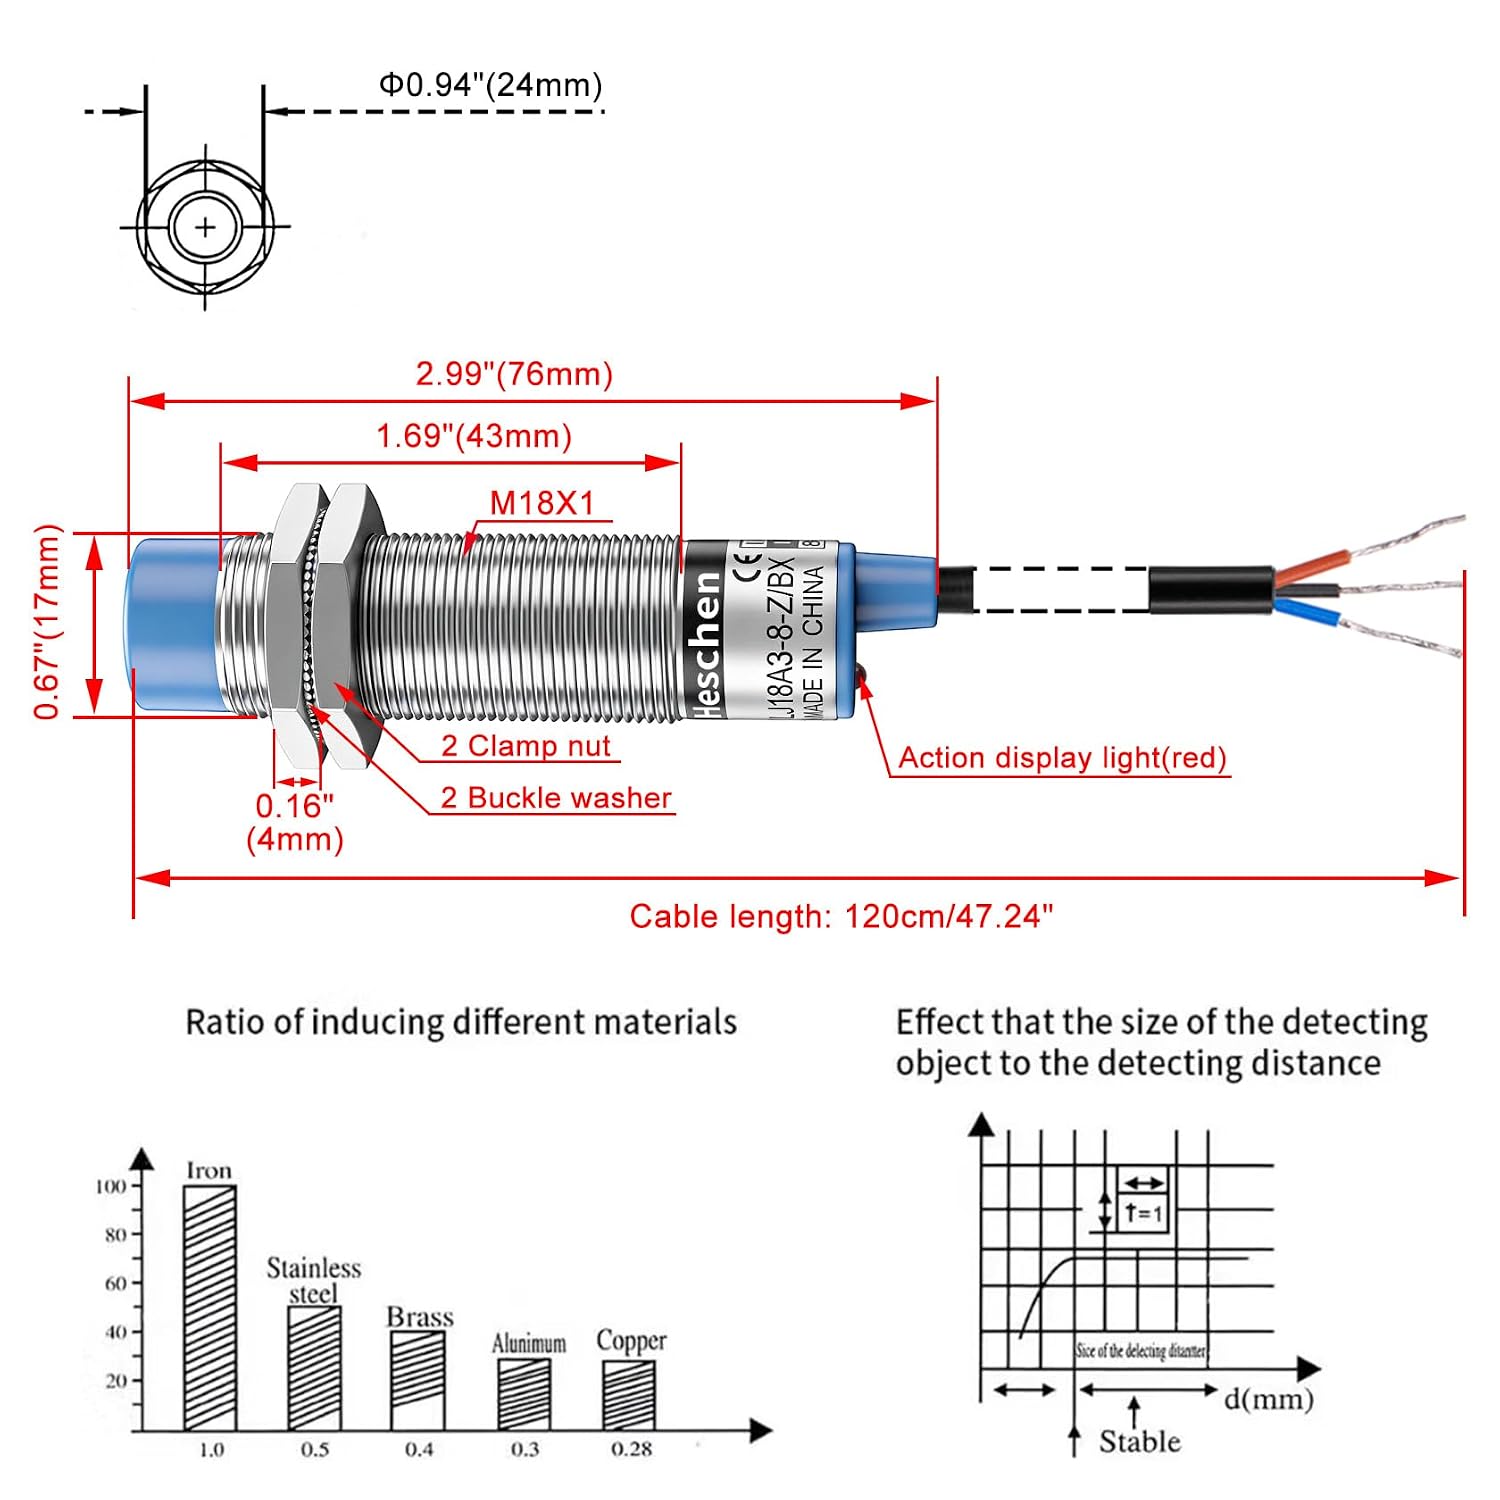
Inductive proximity sensors generate an oscillating magnetic field. When a ferrous or non-ferrous metal object enters that field, it absorbs energy — the sensor’s circuit detects that energy loss and switches. The key implication: inductive sensors only detect metal. They’re blind to plastic, glass, wood, and your fingers. For 3D printer bed leveling, this is both a strength and a constraint: the sensor reliably ignores the glass or PEI surface and tries to detect the steel or aluminum substrate underneath.
Here’s the gotcha that a French-language reviewer of an M18-series inductive sensor documented in precise terms, and that most guides omit entirely: glass build surfaces thicker than approximately 2.9 mm can prevent the underlying metal from registering. Standard 3mm borosilicate glass sits right at that threshold; if you’re running a thicker slab or a glass-over-aluminum sandwich, bench-test your sensing distance with the actual stack before you commit. The manufacturer-rated sensing range on the label assumes bare metal targets.
Capacitive proximity sensors detect any material that affects the electrostatic field they project — metal, plastic, liquid, granules, even your hand. This makes them the right choice when you need to detect a non-metallic target: a plastic part at a CNC fixture, a filament spool presence, or a bin-full level in a hopper. The tradeoff is sensitivity to humidity and spurious triggering on surfaces you didn’t intend to sense.
There’s a notorious capacitive sensor out-of-box problem that one reviewer documented: units appear to be always-triggered when first powered on, before anything is near them. The cause is that the sensitivity potentiometer (a small adjustable resistor on the sensor body) ships set to maximum sensitivity — so the sensor is triggering on the air in front of it, or on the mounting bracket. The fix is to back the pot off with a small flathead screwdriver, turning it many times toward minimum sensitivity, then slowly increasing until you get reliable detection of your actual target. Don’t return the sensor; adjust the pot first.
Photoelectric sensors use light — typically infrared — and come in three configurations:
| Configuration | How it works | Best use case |
|---|---|---|
| Through-beam | Separate emitter + receiver; object breaks the beam | Highest accuracy; part counters, safety gates |
| Retroreflective | Emitter and receiver in one housing; reflector returns beam | Gate presence, garage doors, medium distances |
| Diffuse (proximity mode) | Emitter and receiver in one housing; detects light bounced off target | Short-range part presence, color-independent |
Per Automation World’s photoelectric sensor selection overview, retroreflective configurations give you the best range-to-cost ratio for single-axis presence detection, but they require a clean reflector and a reasonably straight optical path. A retroreflective sensor installed at a garage door threshold — documenting whether the door is fully open — is one of the most reliable long-term use cases reviewers describe, with operators reporting multi-year consistent operation when the reflector is mounted on a stable surface and the sensor lens is kept clean.
NPN vs. PNP Output: The Decision That Determines Your Wiring
This is the question that causes the most confusion at the bench, so let’s be direct about it.
NPN (sinking) output: When the sensor detects a target, the output pin connects to ground (0V). Your load or signal line is pulled low.
PNP (sourcing) output: When the sensor detects a target, the output pin connects to the supply voltage (often 24V). Your load or signal line is pulled high.
Machine Design’s NPN/PNP selection guide frames the choice this way: NPN sensors are traditional in Asian-origin equipment and are common in 3D printer and Arduino-adjacent ecosystems. PNP sensors dominate European and North American industrial standards because sourcing outputs drive indicator lamps and relay coils more intuitively. Most Siemens, Allen-Bradley, and Beckhoff I/O cards default to PNP.
For Arduino, Raspberry Pi, or any 3.3V/5V microcontroller GPIO:
- NPN sensors running on 5V supply: can usually connect output directly to a GPIO input with a pull-up resistor. The sensor sinks the signal low on detection.
- PNP sensors running on 24V supply: you cannot connect the output directly to a 3.3V or 5V GPIO — you’ll destroy the input or get unreliable readings.
Interfacing a 24V PNP Sensor to a 3.3V/5V GPIO: The Resistor Math
A reviewer of an M12 PNP inductive sensor documented the exact voltage-divider calculation for interfacing to an Ender 3 control board GPIO, and it’s worth preserving here because most guides hand-wave through this step.
A resistive voltage divider is the simplest safe approach. You need two resistors, R1 (top, from sensor output to GPIO) and R2 (bottom, from GPIO to ground), chosen so that the voltage at the GPIO pin equals:
V_gpio = V_sensor × R2 / (R1 + R2)
For a 24V PNP output targeting a 3.3V GPIO:
- R1 = 4.7 kΩ
- R2 = 680 Ω → V_gpio ≈ 3.06V ✓ (within 3.3V logic tolerance)
The reviewer’s reported values used 4.7 kΩ and 1 kΩ, which gives approximately 4.3V — safe for a 5V Arduino GPIO input but marginal for 3.3V Raspberry Pi. If you’re targeting 3.3V logic, swap the 1 kΩ for a 680 Ω as shown above, or use a small signal-level MOSFET or an optocoupler for galvanic isolation in electrically noisy environments.
ISA’s practical guide to proximity sensor wiring notes that in environments with VFDs, servo drives, or any switching power supplies nearby, optoisolation between the sensor output and the microcontroller is worth the extra $0.30 in BOM cost to prevent noise-induced false triggers.
Accuracy, Repeatability, and Choosing the Right Sensor for CNC Work
For 3D printer bed leveling, repeatability (does the sensor trigger at the same position every time?) matters far more than absolute accuracy. Operators running the SN04-N inductive sensor on CNC homing applications report ±0.02 mm repeatability and 0.0001-inch trigger consistency in long-run reviews — which is better than most mechanical switches and adequate for virtually all hobbyist and small-shop CNC positioning.
Sensors Magazine’s inductive proximity sensor application guidelines note that the rated sensing distance on the label assumes a standard target: a square mild-steel plate with sides equal to the sensor face diameter. Non-standard targets (aluminum, stainless, small diameter rods) reduce effective sensing distance by a factor of 0.4–0.85 depending on material. If you’re homing against a stainless Z-axis carriage, expect to close the gap compared to the spec-sheet number.
A real failure mode to know: NPN sensor voltage leakage can cause a 3D printer bed-crash. Some NPN sensors pass a small amount of voltage through their output even in the “off” (no target detected) state. On a 3V3 logic board, that leakage can sit above the digital-low threshold, making the controller read the sensor as permanently triggered — so homing never stops. The fix is a pull-down resistor (typically 10 kΩ to ground) on the GPIO input, which swamps the leakage current and ensures a clean LOW reading. If your sensor appears to never de-trigger, check for leakage before assuming the sensor is defective.
Testing Before You Wire: Using a Proximity Sensor Tester
Wiring a sensor into a machine and then discovering it’s dead — or misidentifying a wiring error as a sensor failure — costs time and risks damage. A proximity sensor tester is a handheld tool that powers the sensor, exercises the output, and gives you a pass/fail indication before the sensor touches your machine.
Reviewers of these tools describe using them not just for maker automation but for automotive diagnostics — one operator documents using a sensor tester to evaluate a crankshaft position (CKP) sensor on a 2003 Chevrolet Express, confirming the sensor’s output signal pattern before condemning the part. The same tool that validates an inductive proximity switch on a CNC Z-axis also validates a Hall-effect or variable-reluctance sensor in an engine bay. If you’re building or maintaining automation across multiple domains, one tester earns its cost quickly.
Frequently Asked Questions
Will an inductive proximity sensor detect my 3D printer’s steel build plate through a glass surface? Yes — if the glass is thin enough. The practical threshold documented by operators is approximately 2.9 mm of glass. Standard 3 mm borosilicate glass sits right at that edge; some units will detect through it, others won’t, depending on the specific sensor’s field strength. If your glass is 3 mm or thicker, test on your actual bed before final mounting, or switch to a capacitive sensor that’s rated to detect through non-metallic layers by design.
Why does my new capacitive proximity sensor appear to be always triggered even before I bring any object near it? Almost certainly a factory sensitivity setting issue, not a defective unit. The onboard potentiometer ships at or near maximum sensitivity. Back it off using a small flathead screwdriver — it typically requires many full turns toward minimum — then slowly increase sensitivity until you get reliable detection of your actual target material. Most “DOA” returns of capacitive sensors turn out to be sensitivity-pot issues.
What is the difference between NPN and PNP output and which one should I use with an Arduino or Raspberry Pi? NPN (sinking) output pulls the signal line to ground on detection. PNP (sourcing) output pulls the signal line to the supply voltage on detection. For Arduino and Raspberry Pi, NPN sensors powered from the same 5V or 3.3V rail are easiest to interface directly. PNP sensors at 24V require a voltage divider or level shifter before connecting to a microcontroller GPIO.
How do I connect a 24V PNP sensor output to a 3.3V or 5V microcontroller GPIO without damaging it? Use a resistive voltage divider: 4.7 kΩ from sensor output to GPIO pin, and 680 Ω from GPIO pin to ground. This yields approximately 3.0V — within 3.3V logic tolerance. For 5V logic, the reviewer-documented 4.7 kΩ / 1 kΩ divider gives ~4.3V. In electrically noisy environments, an optocoupler provides better isolation than a passive divider.
Can I use a retroreflective photoelectric sensor to detect when my garage door is fully open? Yes, and this is one of the most reliable long-run applications operators report. Mount the sensor on the door frame and the reflector on the door itself (or vice versa), positioned so the beam aligns only when the door is at full open. Operators report multi-year reliable operation when the reflector surface stays clean and the mounting is mechanically stable. Use a weatherproof-rated unit (IP65 minimum, per Control Engineering’s IP rating guidelines) for any outdoor or garage-threshold installation.
How do I use a proximity sensor tester to confirm whether a sensor is working before wiring it into my machine? Connect the sensor to the tester’s leads (the tester supplies operating voltage and monitors the output), then bring a target object into the sensing range. A working sensor will change the tester’s output indicator — LED, buzzer, or display — at the rated sensing distance. If there’s no response, check wiring polarity first (swapped supply and ground is the most common error), then re-test. If the sensor still doesn’t respond, it’s either out of range for your target material or genuinely faulty. These testers also work across sensor types, including automotive Hall-effect and variable-reluctance sensors, making them a single-tool solution for mixed-domain troubleshooting.
The Decision Rule
Here’s the if/then framework for the most common maker-and-integrator decisions:
- If your target is metal and you need repeatability under 0.05 mm → inductive proximity sensor, NPN for Arduino/3D printer boards, PNP for industrial I/O cards. Size M12 or M18 to match your mounting hole standard.
- If your target is non-metallic (plastic, filament, liquid, powder) → capacitive proximity sensor; budget time to set the sensitivity pot before installation.
- If you need presence detection across a gap wider than 10 mm and target material varies → retroreflective or through-beam photoelectric. Through-beam for the highest reliability; retroreflective where running a cable to a separate receiver is impractical.
- If you’re wiring any 24V industrial sensor to a 3.3V microcontroller → resistive divider (4.7 kΩ / 680 Ω) as a minimum; optocoupler if you have any switching noise sources nearby.
- If your sensor appears always-triggered before anything is near it → check the sensitivity pot (capacitive) or add a 10 kΩ pull-down on the GPIO (NPN leakage).
The sensor that seems like the cheapest line item on your BOM has an outsized effect on system reliability. Getting the physics and the output type right before you order saves you the far larger cost of a bed crash, a machine stop, or a board with a fried GPIO.