Ceiling Occupancy Sensors vs. Wall Switches: Choosing the Right Form Factor for Garages, Shops, and Barns
You walk into a dark garage carrying a box, both hands full — and the light doesn’t come on because the wall switch near the door can’t see you once you’ve moved ten feet past the entry point. That’s not a faulty sensor; that’s a form-factor mismatch. Occupancy sensors (devices that automatically switch lights on when they detect motion and off when the space is empty) come in two fundamentally different mounting styles: wall switches, which replace a standard light switch in a gang box, and ceiling-mount sensors, which install either in a junction box or directly onto a fixture and look down over the whole space. For a hallway or small bathroom, a wall switch is usually fine. For a one-car garage, a three-bay shop, or a barn with hay storage on one side and tools on the other, the coverage geometry is almost always wrong at the wall.
This guide breaks down exactly when each form factor wins, shows you the physics behind two failure modes buyers discover only after install, and gives you a clear decision rule so you’re not buying the second unit to fix the first.
| EDITOR'S PICK[Sensor Switch CMR 10 Contractor](https://www.amazon.com/dp/B004QIZGOW?tag=greenflower20-20)… | Mid-tier[ECOELER PIR Ceiling Sensor Swit](https://www.amazon.com/dp/B0B41Y51L4?tag=greenflower20-20)… | Budget pick[ECOELER Ceiling Occupancy Motio](https://www.amazon.com/dp/B0B453KLDR?tag=greenflower20-20)… | |
|---|---|---|---|
| Sensor Type | Passive Infrared | PIR | Passive Infrared |
| Mounting | Ceiling | Ceiling | Ceiling/Fixture |
| Detection Range | Extended Range | 360° | 360° |
| Voltage | — | — | 120/277VAC |
| Listings | — | UL & FCC | UL, FCC |
| Relay Included | ✓ | — | — |
| Price | $52.80 | $13.59 | $13.59 |
| See on Amazon → | See on Amazon → | See on Amazon → |
Why the Form Factor Problem Is Worse in Garages Than Anywhere Else
A standard wall-switch occupancy sensor uses a PIR (passive infrared) detector — a sensor that reads changes in infrared heat signatures moving across its field of view. The critical word is across: PIR sensors detect lateral motion far better than motion moving directly toward or away from the lens. Mounted at the wall beside the door, the sensor’s field of view fans out along the wall. Anyone working at the far end of the space, moving parallel to that same wall or bending over a workbench, may be moving directly toward or away from the sensor rather than crossing its beam — and that’s the dead zone.
Published installation guidance from both Lutron Electronics (Maestro Occupancy/Vacancy Sensor Product Guide, 2025) and Leviton Manufacturing (Decora Motion Sensor Installation Guide, 2024) explicitly notes that wall-switch sensors are optimized for rooms up to roughly 900 square feet with the sensor near the room’s primary activity zone. A two-car garage runs 400–480 square feet; a three-car garage runs 600–720 square feet. On paper that’s within range — but those coverage estimates assume the sensor is near the activity, not at the door 30 feet from the workbench.
Ceiling mount solves the geometry. Installed at or near the center of the space, a ceiling sensor’s 360° PIR coverage pattern looks down uniformly. Any lateral motion anywhere in the coverage radius crosses the sensor’s detection zone. Fixture-mount sensors that clip directly onto a light fixture are the easiest retrofit — no new wiring run required if you already have a switched fixture at center ceiling. Junction-box ceiling sensors require a box rough-in but allow the sensor to operate independently of any single fixture.
The Two Failure Modes You’ll Hit Before You Diagnose Them
Failure Mode 1: The IR Camera Keeps Your Lights On All Night
Multiple owner reviews of ceiling PIR sensors — including units like the ECOELER YM2501A and comparable fixture-mount sensors — describe the same baffling symptom: the lights stay on all night even when the garage is completely empty. The natural assumption is a faulty sensor, but the actual cause is almost always a security camera with active IR illumination.
Here’s the mechanism: many security cameras use arrays of near-infrared LEDs (typically 850 nm or 940 nm) to illuminate a scene in darkness. PIR sensors don’t detect the IR wavelength directly the way a camera does — they detect changes in the infrared heat envelope of the scene. But a camera’s IR array creates a localized heat signature on surfaces it illuminates, and as the camera’s auto-IR circuit modulates its output (responding to ambient light changes, for example), the PIR sensor reads that modulation as motion. The result is false-positive triggering that’s nearly impossible to reproduce during a daytime inspection.
The fix: reposition the camera so its IR illumination zone doesn’t overlap the PIR sensor’s coverage area, or switch to a camera with 940 nm IR (which is less visible and generally lower power, producing a smaller thermal signature variation). As a secondary option, most ceiling sensors have an adjustable sensitivity dial — reducing sensitivity by 20–30% often drops the camera’s interference below the trigger threshold without creating detection dead zones for a person-sized heat source. Texas Instruments’ PIR Motion Detector Design Reference (Application Note SLAA776) explains the signal-chain detail: PIR pyroelectric elements respond to the rate of change of incident IR flux, which is exactly what a modulated IR LED array produces.
Failure Mode 2: The Summer Sensitivity Collapse
If your ceiling sensor works reliably in winter but misses motion in summer — including one documented owner report of walking 10 feet toward a washing machine at maximum sensitivity with no trigger — the culprit is PIR physics at high ambient temperature, not a defective unit.
A PIR sensor detects contrast: the difference between a human body’s ~98 °F (37 °C) surface temperature and the ambient background. When ambient air temperature climbs toward 85–95 °F (29–35 °C), which is routine in an uninsulated metal garage in summer, that contrast shrinks. The pyroelectric element produces a weaker signal. Sensors Magazine’s 2022 analysis of PIR performance in high-ambient-temperature environments notes that detection range can degrade by 30–50% when ambient temperature rises above 35 °C, with some low-cost PIR modules becoming nearly non-functional near human body temperature.
Practical implication: if your garage regularly exceeds 85 °F in summer, a standard consumer-grade PIR ceiling sensor will have reduced reliability during those hours regardless of sensitivity setting. Options: (1) add a second sensor to reduce required detection distance per unit, (2) use a dual-technology sensor (PIR + microwave/Doppler) that uses the microwave element to compensate when PIR contrast is low, or (3) accept that a high-ambient space may need manual override capability.
Fixture-Mount vs. Junction-Box Ceiling Sensors: The Wiring Reality
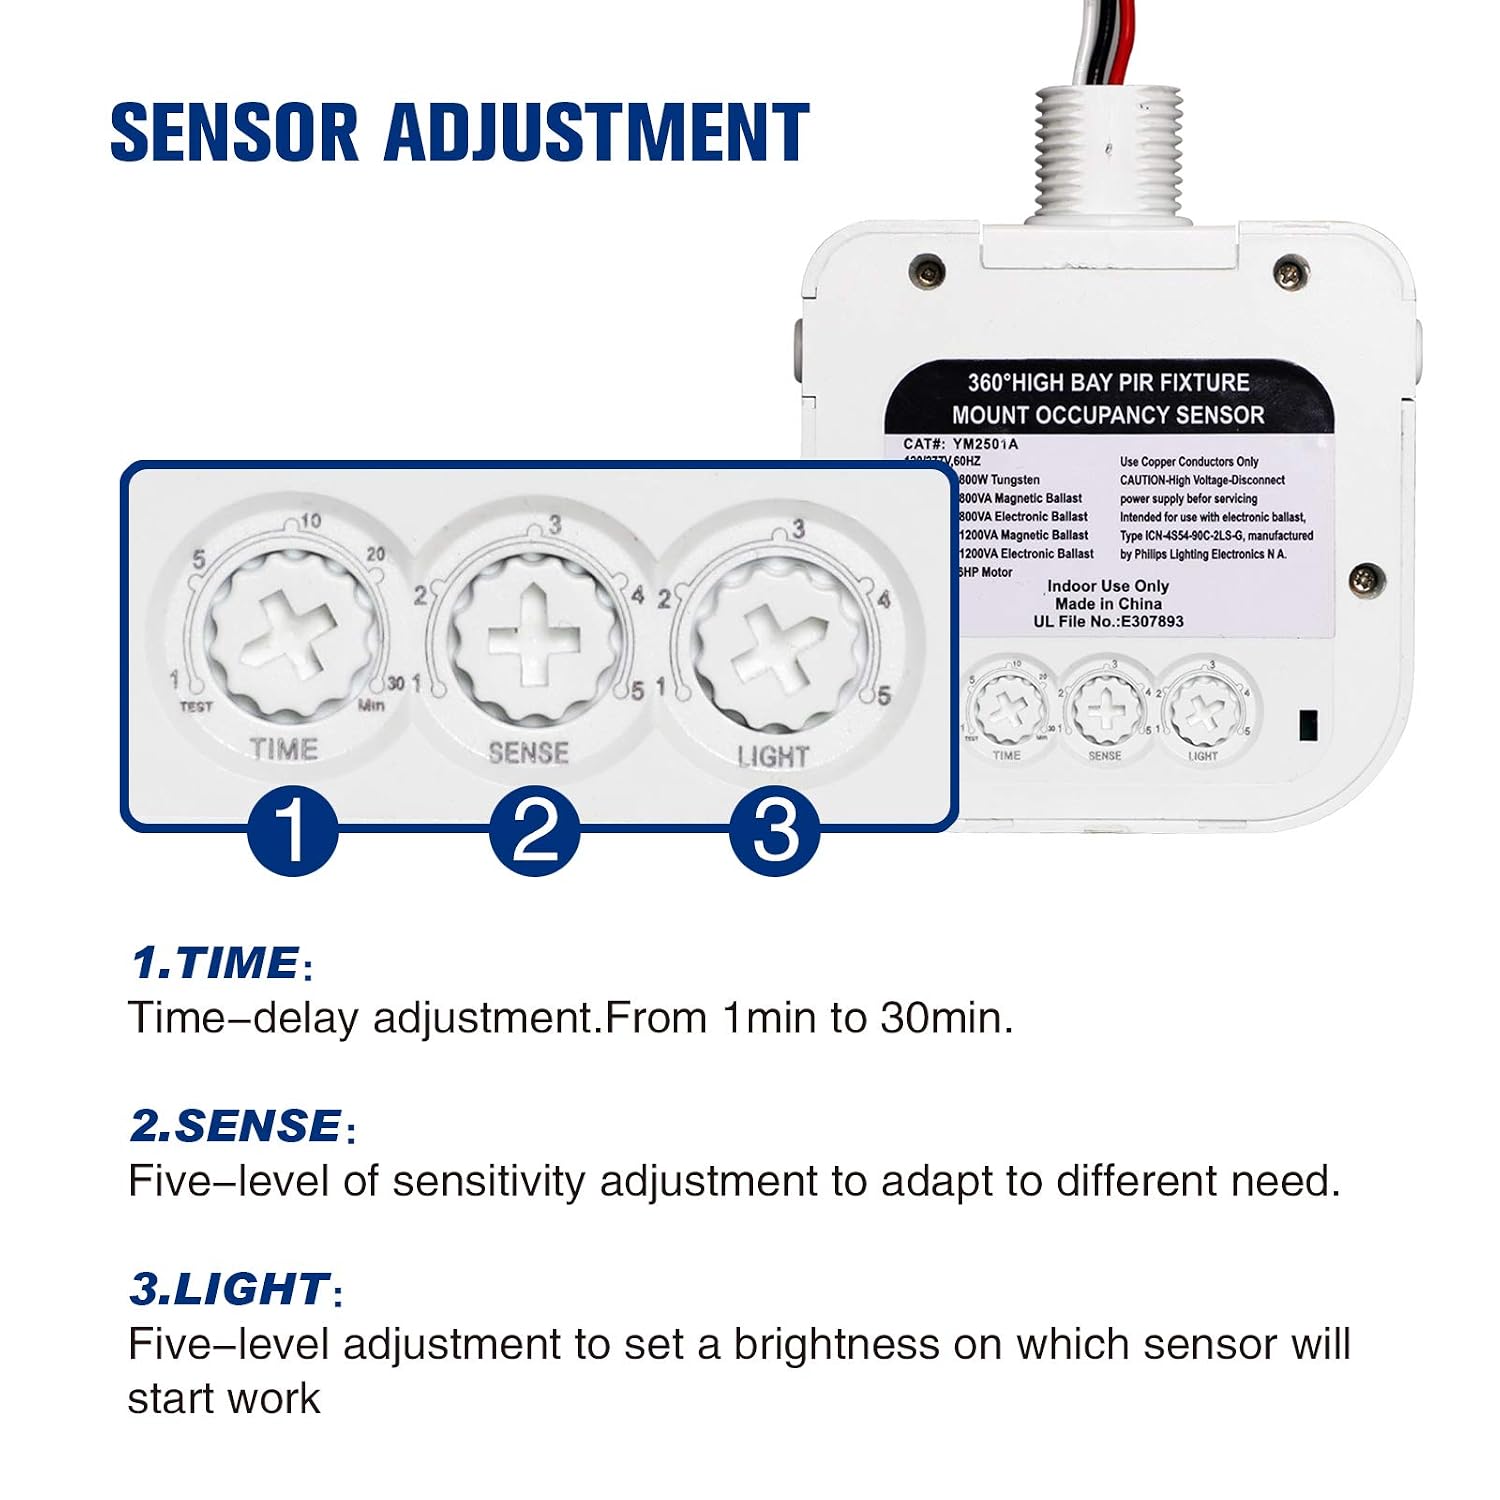
Fixture-mount sensors (like the ECOELER YM2501A) physically integrate with the light fixture itself. The sensor replaces or adds onto the fixture, drawing its power from the same supply line. Installation is typically a direct wire splice — no separate circuit, no additional conduit run. If you already have a ceiling light in your garage, this is almost always the right starting point.
Junction-box ceiling sensors (like the Sensor Switch CMR 10) mount independently in a standard ceiling box and connect to the building wiring. They can control multiple fixture circuits and support low-voltage signal outputs for integration with building automation or relay panels. The CMR 10 supports field-configurable time delays, sensitivity zones, and hold-on times via a multi-step programming sequence that, based on aggregated installer feedback, has a noticeably steeper setup curve than the ECOELER’s approach. Where the ECOELER YM2501A’s snap-off sensor head lets you physically reposition the PIR element mid-air to fine-tune coverage angle without tools — a feature owners consistently single out as a genuine convenience during initial calibration — the CMR 10 requires parameter changes via DIP switches or software, appropriate for a commercial retrofit but overkill for a residential shop.
By the Numbers
| Form factor | Typical coverage (ceiling height 8–12 ft) | Wiring complexity | Best for |
|---|---|---|---|
| Wall switch | 180° fan, ~500–900 sq ft | Replaces existing switch | Small rooms, single-zone |
| Fixture-mount ceiling | 360°, 500–1,500 sq ft | Splices at fixture | Garage/shop retrofit |
| Junction-box ceiling | 360°, 1,000–2,500 sq ft | Needs ceiling box | Commercial, multi-zone |
Decision Rule: Which Form Factor to Buy
If X, then Y:
- If your space is under 400 sq ft and the entry door is on a short wall: a wall switch may cover adequately; verify the activity zone is within 15 ft of the switch.
- If your space is 400–1,500 sq ft (typical 1- to 3-car garage, single-bay shop, or small barn) and you already have a ceiling fixture: start with a fixture-mount ceiling sensor. The ECOELER YM2501A’s adjustable head and simple install make it the logical first-attempt for this profile.
- If your space exceeds 1,500 sq ft, has multiple lighting circuits, or you need integration with a building automation panel: move to a junction-box sensor like the Sensor Switch CMR 10. Accept the programming complexity as the cost of that flexibility.
- If your ambient summer temperature regularly exceeds 85 °F: plan for either dual-technology sensing or a second sensor, regardless of which form factor you choose.
- If you have active IR security cameras in the same space: resolve the camera overlap before attributing false-positive triggering to a faulty sensor.
Frequently Asked Questions
1. Can I install a ceiling occupancy sensor without running a new circuit if I already have a wall switch?
Yes, in most cases. A fixture-mount ceiling sensor installs directly at the existing fixture and uses the same wiring that already feeds that light. You’re not adding a circuit — you’re adding intelligence at the load end. The wall switch can remain as a manual override (see FAQ 5). No permit is typically required for a like-for-like fixture modification, but verify with your local jurisdiction.
2. Why does my ceiling sensor stay on all night even when the garage is empty?
The most common cause is IR interference from a security camera with active infrared illumination. The camera’s IR LED array creates a modulating thermal signature that PIR sensors interpret as motion. Reposition the camera so its IR cone doesn’t overlap the sensor’s coverage area, or reduce sensor sensitivity slightly. A faulty sensor is a distant second explanation — rule out cameras first.
3. Why does my PIR ceiling sensor fail to detect motion in summer but work fine in winter?
PIR sensors detect the contrast between your body temperature (~98 °F) and the ambient background. When garage air temperature climbs above 85–90 °F in summer, that contrast narrows and the sensor’s detection range drops significantly — sometimes by half. This is a physics limitation, not a defect. Dual-technology sensors (PIR + microwave) are more robust in high-ambient-temperature environments.
4. How many ceiling sensors do I need for a 3-car garage?
A 3-car garage is typically 600–720 square feet. One quality fixture-mount sensor rated for 1,000+ sq ft at your ceiling height should cover the full space if mounted at or near center. If the fixture is off-center or near one wall, add a second sensor. Summer heat degradation is a reason to plan for two from the start in hot climates, reducing required detection range per unit.
5. Can I keep a manual override wall switch and add a ceiling occupancy sensor in the same circuit?
Yes. The standard approach is to set the existing wall switch to the permanent ON position and let the ceiling sensor handle switching. Some fixture-mount sensors include a “manual-on/auto-off” (vacancy) mode — the light must be turned on manually but turns off automatically. If your wall switch is a dimmer, verify the ceiling sensor is compatible with dimmer-controlled circuits before purchasing; many PIR sensors require a neutral wire or a non-dimmer hot supply.
6. What is the difference between a fixture-mount and a junction-box ceiling occupancy sensor?
A fixture-mount sensor attaches to or integrates with the light fixture itself, drawing power from the fixture’s supply wires. Installation requires no separate ceiling box and is the simplest retrofit path. A junction-box sensor mounts independently in a standard electrical box in the ceiling, operates separately from any individual fixture, and can control multiple circuits or interface with low-voltage control systems. Fixture-mount is the right default for residential and light-commercial retrofits; junction-box is the right choice when you need commercial-grade programming, multi-zone control, or building automation integration.